Visual Studio Code With Rapidly Rising Rust – With a Simple Guide

No Comments »

Rust is a blazingly fast and memory-efficient programming language with no runtime or garbage collector. It is also one of the fastest-growing programming languages, is the subject of a new Visual Studio Code topic. Announced in the latest update to VS Code (the April 2022 update bringing it to v1.67), the new Rust in Visual Studio Code topic describes Rust programming language support in VS Code with the rust-analyzer. Rust has been gaining popularity and is seeing tremendous adoption amongst developers. This post will assist anyone wanting to develop Rust applications using Visual Studio Code (VS Code).

According to VS Code, “Rust is a powerful programming language, often used for systems programming where performance and correctness are high priorities,” reads the new topic. “If you are new to Rust and want to learn more, The Rust Programming Language online book is a great place to start. This topic goes into detail about setting up and using Rust within Visual Studio Code, with the rust-analyzer extension.”

The new topic comes amid a years-long rise in Rust popularity. For example, Rust made a big splash in the .NET-centric developer community several years ago when we reported “C++ Memory Bugs Prompt Microsoft to Eye Rust Instead.” That article referenced posts from the Microsoft Security Response Center (MSRC) titled “A proactive approach to more secure code” along with “We need a safer systems programming language” and “Why Rust for safe systems programming.”

There doesn’t seem to have been much progress since then on adopting Rust as a C++ replacement for systems programming, but Microsoft, which joined the Rust Foundation last year, posted documentation in February titled “Overview of developing on Windows with Rust.” Microsoft has also spearheaded Project Verona on GitHub, described as “a research project being run by Microsoft Research with academic collaborators at Imperial College London. We are exploring research around language and runtime design for safe scalable memory management and compartmentalization. The prototype here only covers the memory management aspects of the research.” Also, one of those MSRC 2019 posts noted that Rust topped Stack Overflow’s list of most loved languages for four years running, and its ascent continues today.

As far as the rust-analyzer extension for VS Code, its features include:

  • Codecompletion with imports insertion
  • Go to definition, implementation, type definition
  • Find all references, workspace symbol search, symbol renaming
  • Types and documentation on hover
  • Inlay hints for types and parameter names
  • Semantic syntax highlighting
  • A lot of assists (code actions)
  • Apply suggestions from errors

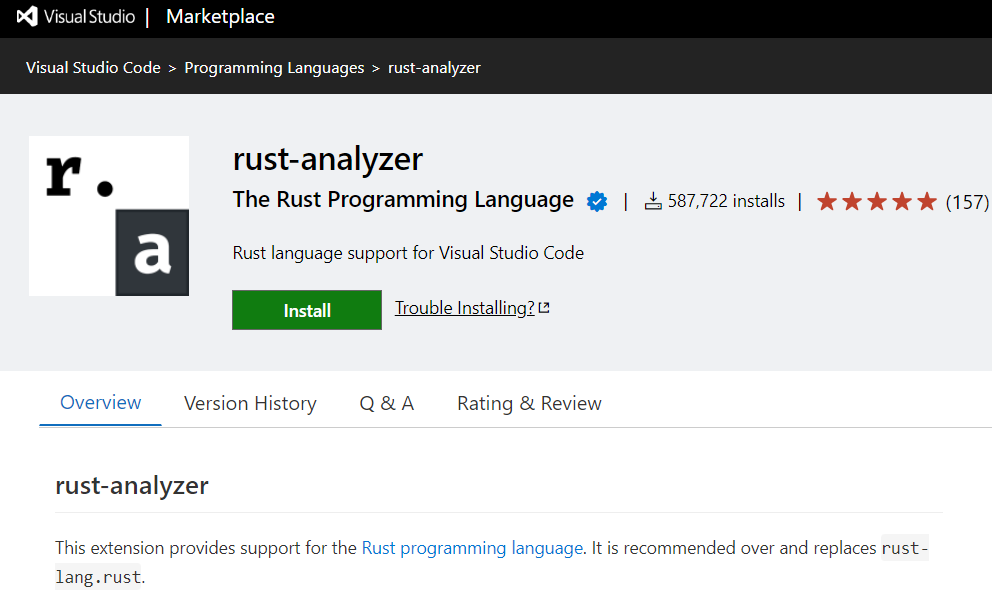
It has been installed more than 587,000 times, earning an average 4.9 rating (scale 0-5) from 157 developers who reviewed it.

Installation Process

Install Rust

First, you will need to have the Rust toolset installed on your machine. Rust is installed via the rustup installer, which supports installation on Windows, macOS, and Linux. Follow the rustup installation guidance for your platform, taking care to install any extra tools required to build and run Rust programs.

As with installing any new toolset on your machine, you’ll want to make sure to restart your terminal/Command Prompt and VS Code instances to use the updated toolset location in your platform’s PATH variable.

Install the rust-analyzer extension

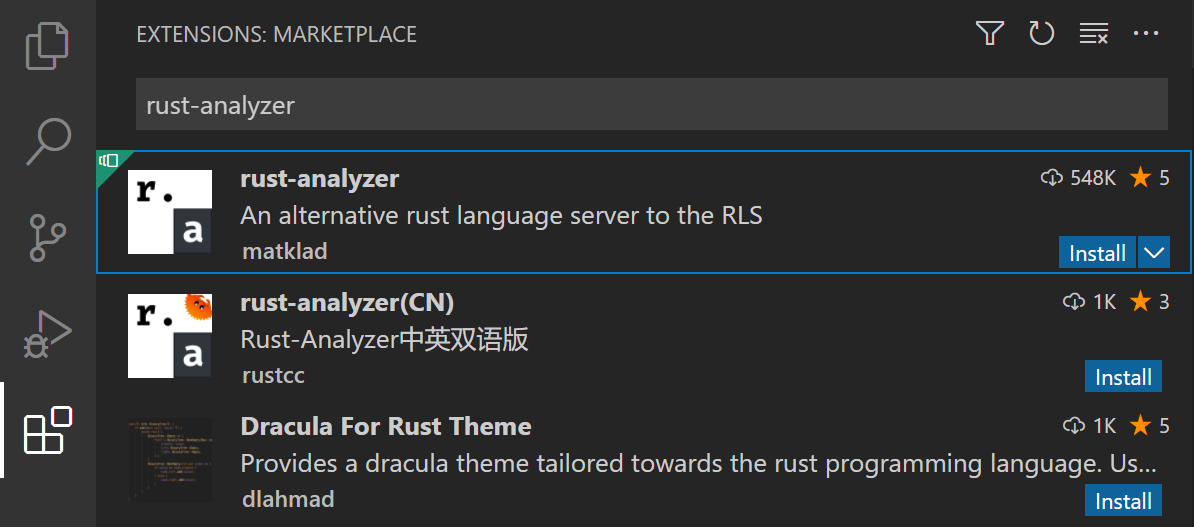
You can find and install the rust-analyzer extension from within VS Code via the Extensions view (Ctrl+Shift+X) and searching for ‘rust-analyzer’. You should install the Release Version.

rust-analyzer extension in the Extensions view

To discuss more of rust-analyzer features or to learn more about this topic you can refer to the extension’s documentation at https://rust-analyzer.github.io.

Check your installation

If you complete the above instruction you will be good to go and start coding in Rust, but after installing Rust, you can also check whether everything is installed correctly or not by opening a new terminal/Command Prompt, and typing:

rustc –version

Which will output the version of the Rust compiler. If you run into problems, you can consult the Rust installation guide. You can keep your Rust installation up to date with the latest version by running:

rustup update

There are new stable versions of Rust published very 6 weeks so this is a good habit. When you install Rust with rustup, the toolset includes the rustc compiler, the rustfmt source code formatter, and the clippy Rust linter. You also get Cargo, the Rust package manager, to help download Rust dependencies and build and run Rust programs. You’ll find that you end up using cargo for just about everything when working with Rust

Local Rust documentation

When you install Rust, you also get the full Rust documentation set locally installed on your machine, which you can review by typing rustup doc. The Rust documentation, including The Rust Programming Language and The Cargo Book, will open in your local browser so you can continue your Rust journey while offline.

Next steps & Summary

This has been a brief overview showing the rust-analyzer extension features within VS Code and the installation process for Rust in VS Code. For more information, see the details provided in the Rust Analyzer extension User Manual, including how to tune specific VS Code editor configurations.

To stay up to date on the latest features/bug fixes for the rust-analyzer extension, see the CHANGELOG. You can also try out new features and fixes by installing the rust-analyzer Pre-Release Version available in the Extensions view Install dropdown.

If you have any issues or feature requests, feel free to log them in the rust-analyzer extension GitHub repo.

If you’d like to learn more about VS Code, try these topics:

Zoom the View in Visual Studio

No Comments »

I was using Visual Studio on my laptop when suddenly the font in the code editor got so small I could barely read it.  I figured I must have engaged some obscure key sequence, so I did a little research and discovered there are many ways to change the zoom level in Visual Studio:

Keyboard Shortcuts

  • To make the font larger, press CTRL+SHIFT+PERIOD
  • To make the font smaller, press CTRL+SHIFT+COMMA

Keyboard+Mouse Shortcuts

  • To make the font larger, press & hold the CTRL key while scrolling the mouse wheel up one click
  • To make the font smaller, press & hold the CTRL key while scrolling the mouse wheel down one click

Note this also works with the trackpad on most laptops.  Sliding your finger up or down along the right edge of the trackpad is the same as scrolling the mouse wheel.  By the way, I had the CTRL key pressed while I slid my finger down along the right edge of the trackpad, and this is how I accidentally made the font really small.  Also note that each click increases or decreases the font size by 10%.

Read the rest of this entry »

Microsoft.CSharp.targets was not found

1 Comment »

If you receive the following Visual Studio compiler error:

Error MSB4019: The imported project "C:Microsoft.CSharp.targets" was not found. Confirm that the path in the <Import> declaration is correct, and that the file exists on disk.

Read the rest of this entry »

Visual Studio 2010 Service Pack 1

No Comments »

Microsoft Visual Studio. Copyright © Microsoft Corp.

Microsoft has released Service Pack 1 for its Visual Studio 2010 flagship integrated development environment (IDE).  Visual Studio SP1 provides many new features, performance improvements, and bug fixes including:

  • Stand-alone Help Viewer 1.1
  • Silverlight 4 support
  • Basic Unit Testing support for .NET 3.5
  • .NET Framework 4 improvements
  • Performance Wizard for Silverlight
  • Visual Basic Runtime embedding
  • IntelliTrace for 64-bit and SharePoint
  • Fix for partial or mixed Visual Studio installations
  • IIS 7.5 Express support
  • SQL Server CE 4 support
  • Razor support for ASP.NET Web Pages and MVC 3
  • Web Platform Installer integration
  • HTML5 and CSS3 preliminary support
  • WCF RIA Services localized and supported
  • XAML Editor/Designer improvements
  • XAML Style IntelliSense
  • C++ MFC-based GPU-accelerated graphics and animations
  • New AMD and Intel instruction set support

Download Visual Studio 2010 SP1
Full Description of VS 2010 SP1
Tips on Installing VS 2010 SP1

Visual Studio Productivity Power Tools Update

No Comments »

Visual Studio Productivity Power Tools.  Copyright © Microsoft Corp.

Microsoft has updated the free Productivity Power Tools for Visual Studio 2010.  These are add-ins that provide very useful additional functionality for Visual Studio.  New in this release:

  • No More Extension Resets – This version of the Productivity Power Tools will be the last which resets the extensions.
  • Find – Quick find & incremental search now pops up at top right-hand corner of the editor.
  • Enhanced Scrollbar – Icons overlay the scrollbar to show edits, breakpoints, bookmarks, errors, warnings, etc.
  • Middle-Click Scrolling – Use your scroll wheel to quickly scroll through your document.
  • Organize Imports for Visual Basic – Sort the imports logically and remove the ones that aren’t being used.

Productivity Power Tools for Visual Studio 2010

See more .NET News like this!

Project is not selected for building in solution configuration

3 Comments »

When building a Visual Studio project, you may encounter the following error:

The project "MyProject" is not selected for building in solution configuration "Debug|Any CPU".

This error occurs because the project has not been configured to build in your Visual Studio solution.  The solution is simple:

Read the rest of this entry »

Visual Studio 2010 Service Pack 1 Beta

No Comments »

The beta version of Visual Studio 2010 Service Pack 1 (SP1) is now available for download.  SP1 Beta includes:

  • Many bug fixes
  • Performance improvements
  • Better platform support
  • Unit Testing on .NET 3.5
  • VB Compiler runtime switch
  • Other new features

Download VS2010 SP1 Beta
What’s New in VS2010 SP1 Beta

Step into: Stepping over method without symbols

2 Comments »

When debugging a project line-by-line in Visual Studio, you may receive this error:

Step into: Stepping over method without symbols ‘namespace’

This error occurs when you attempt to debug a DLL or EXE that is lacking a symbols (.pdb) file. 

Check the project’s binDebug folder to ensure the DLL/EXE in question has a corresponding pdb file.  If not, be sure to build the DLL/EXE with its project configuration set to “Debug” so that it will generate a pdb file. 

If the problem occurs with a third-party library, you may be out of luck because most third-party libraries do not include a pdb file, and therefore you cannot debug into them.

A StackOverflow article says this error may also occur if you attempt to debug a yield expression in a method that returns an IEnumerable, though I have not confirmed this.

Visual Studio Startup Project Not Saved in Solution File

No Comments »

If you have multiple Projects in a Visual Studio Solution, you can specify the “Startup Project,” which is the project that runs when you “Start Debugging” or “Start Without Debugging”.  The Startup Project appears bold in the Visual Studio Solution Explorer.  Step-by-step instructions to set the Startup Project can be found here.

If you use a source repository, perform automated builds, or do any Visual Studio solution file hacking, you may be disappointed to discover that the Startup Project is not saved in the Solution file (.sln), but rather in the Solution User Options file (.suo). 

The Solution User Options file contains settings — such as breakpoints, open files and views — that are specific to the current user.  Therefore the User Options file is not usually saved in a source repository, so it’s difficult to share the Startup Project across a team.

In addition, while the Solution File is an easy-to-modify XML file, the Solution User Options file is a hard-to-modify binary file, so it’s nearly impossible to programmatically set the Startup Project.

Which means that each developer must manually set the Startup Project for each Visual Studio Solution.

Where to Find SN.exe

1 Comment »

SN.exe is a Strong Name tool that can sign assemblies, manage strong name keys, and generate and verify signatures.  You will typically find it here:

C:Program Files (x86)Microsoft Visual Studio 8SDKv2.0Bin

If you cannot find it there, check “C:Program Files” on 32-bit systems.  Also check the folders corresponding to other versions of Microsoft Visual Studio, such as “Microsoft Visual Studio 9.0” etc.  If you still cannot find it, run a search on your C: drive. 

If SN.exe is not installed on your hard drive, you can download it here:

.NET Framework 2.0 Software Development Kit (SDK)
x86   x64

According to Microsoft, since .NET Framework versions 3.0 and 3.5 are built incrementally on the .NET Framework version 2.0, many of the tools included in the .NET Framework 2.0 SDK are the latest versions available.  But just in case, you can download the newest version of .NET:

.NET Framework 4 redistributable package

keep looking »